Dec 23, 2011

On Vacation

To all my followers, I have been so busy and now need a 7 day  break. This however doesn't mean I have stopped creating. I am starting the new year off with a new post everyday in the month of January to kick off our new mini coming to a demonstrator near you. I hope everyone has a blessed holiday and I look forward to sharing with you in the New Year. Happy Stamping.
Brenda Anderson

Nov 27, 2011

Advent Fun

Good Morning,
We had so much fun making this in class yesterday. It looks like so much work but really I had everything die cut and punched so we assembled and stamped. It did take 3 hours but well worth the effort. I used a water bottle box and filled it with cupcake liners to separate each day. Wow was that easier than digging through a plastic bag of parts! I did use the designer paper Holly Berry and the 4 main colors of cardstock were Real Red, Wild Wasabi, Very Vanilla, and Chocolate Chip. The stamp set was 25 & counting 123794. The 3 ink pads and markers colors were Wild Wasabi, Real Red, and Chocolate Chip. Real Red glitter paper used for the star.The Die cut used was Stars #2 Peekaboo Frames 124587. The punches used were Curly Label 119851,Scallop Circle 119854, Scallop Square 119884, 1" Circle 119868, 1 1/4" Circle 119861, 1 3/8" Circle 119860, 1 1/4 Square 119865, Postage Stamp 122344. The Holly Punch, 1" punch ,and snowflake punch purchased from another retailer. If you want the larger cardstock squares are 2 x 2 and you can use an embossing folder and the big shot to give it texture. I also used the real red taffeta ribbon for a bow. Whenever using glitter paper and bows on projects like this use glue dots because they work the best. I also used my scissors to cut the some of the stamp numbers out like day 6. making these 3-4 at a time works great for multiple gifts at once!
Thanks for stopping
Brenda Anderson

Nov 18, 2011

Another CASE

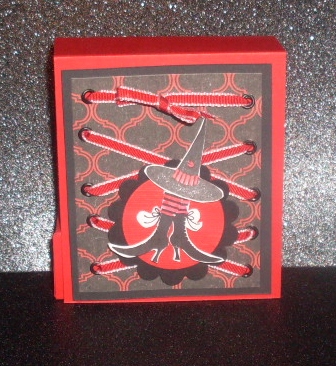
I have the BEST upline. She has given me so much inspiration, actually I should be giving credit to 2 women. Diane Trintz and Jerilyn Woods are both my direct up-line. We made something similar in the fall and I just simplified the cards for a great workshop to do during November and December.
Very duplicatable and easy. Of course they showcase what a value our Kraft boxes that sell for 2.95 and you get 4 of them! We make 4 cards with our small envelopes inside. These envelopes are to small to mail but great to give in person. Who wouldn't love this box of cards for a co-worker or teacher. Personally I love using the dotted glitter design and the green wasabi fabric in the pack! So here is the recipe!
The Box
1 Kraft box
Designer paper Holly Berry top and bottom are cut 3.25 x 3.25 and the sides are 2.25 x 3.25
Holly Berry Fabric cut 2.50 x 24 inches
White taffeta ribbon cut 10 inches long
1 holly berry designer buttons- Large either red or wasabi
10 inches of linen thread
So to assemble you need to tape the designer paper down to the box on all 4 sides. Add your cards (The recipe for them is at the bottom of the post) Tie the fabric around the box and knot. make a quick bow and using a glue dot add to the middle of the red button. Thread the linen thread under the knot and bring up through button holes and knot around the bow. This allows the fabric and button to stay in place and be removed without untying.
The Cards
Cut 2 Real Red pieces of cardstock 3 x 6
cut 2 Wild Wasabi pieces of cardstock 3 x 6
Cut 8 whisper white 2.75 x 2.75 (1 goes on the inside of the card)
Snowflake punch
Smaller Holly Berry designer buttons
Glue dots
Black ink
Greeting stamp
small envelopes 107309 (40)
Fold your cardstock, snail in the white 2.75 x 2.75 cardstock on the inside. Take the 2.75 x 2.75 of the white and center it all the way down into the snowflake punch. Punch and remove, stamp your greeting and tape down to the main cardstock. using a glue dot add the small button in the center. Done! How easy is this card? Hope you enjoyed this post I enjoyed making it.
Happy Stamping Brenda Anderson

Sounding Joy

So how is everyone? I have been really busy lately and have been horrible at regular post's. So I am sorry to all. OK with that being said lets get on with it.
I have this great door hanger. I chose the word JOY because it is non religous.
Here's the recipe.
Cardstock:
Cherry Cobbler
Wild Wasabi,
Very Vanilla
Designer Paper:
Holly Berry
Ribbon:
Wide Cherry Cobbler
Die cuts:
Scallop Square Die is 4.5 x 4.5
I used my big shot and the Clear Scallop Square and Cherry Cobbler for the first layer. Very Vanilla was cut 4 x 4 and using the embossing folder Polka Dots for a pattern. Wild Wasabi was cut 3 x 3 and the designer paper was cut 2.75 x 2.75.
I used the Cricut to cut my letters and dimensionals to lift them. I picked up some silver jingle bells at the local store and tied them on with Bakers twine. Quick and easy. We made these at my monthly club night and everyone loved them.
Thanks for stopping.
Brenda

Nov 12, 2011

Christmas Stamp a Stack Kit NOW available

Here are the NEW Christmas Stamp a Stack Kits NOW available. You get 24 card kits 4 of each style including envelopes. You can pay using Pay Pal. I have set this up for my customers out of state who like to participate in our annual Christmas Stamp a Stack. I will include directions and will have a video on Youtube. As always all your extra supplies can be purchased directly from my store.
http://www.stampinup.net/esuite/home/brendasplace/
Thanks Brenda Anderson
The paypal button is to the right. Send me your mailing information directly to brenda44brenda@yahoo.com

Nov 10, 2011

C-copy A-and S-share E-everything Card

Good morning,
A funny title for a card, right? Well I did that because I really liked the box Christmas Keepsake Stampin up had given to new recruits back in July. That kit is still for sale through December 31 while supplies last. Well I Cased it and changed a few things because I could have never fit it all on a card. I hope you like it.
Here's the recipe:
Base card 8.5 x 5.5 in Wild Wasabi and run through the Big Shot using your Perfect Polka Dot embossing folder.
1st Layer: Cut Real Red 4.25 x 5.5 using the Big Shot and your Top Note die cut out the image.  Using the Big Shot again and your Petals-a-Plenty embossing folder emboss the image on the real red.
Using the Holly Berry Designer paper cut a strip (I chose the light wasabi print) that is 1.5 x 4.5. Use your Scallop Trim Border punch and punch along bottom edge of the strip. Glue in place on the Real Red top note and trim the edges. I cut a 2.75 x 2.75 piece of Holly Berry Designer Paper and using the corner round punched all 4 corners. I punched a designer label image out of Real red but needed to use Glue dots to stick to the glitter paper. Using our Real Red Satin ribbon tied a bow and used a (several) Glue Dot to adhere to the glitter paper. I used the Pines and Pointsetta stamp set from the holiday mini and my stamp and write markers (Chocolate Chip, Always Artichoke, Real Red) to create the pine cones and leaves. I did it twice so out of the second I could cut out the pine cones and raise the using dimensionals. I stamped the Christmas banner onto Very Vanilla using Real Red ink cut and raised with dimensionals. It looks even better when you make this into a gift card box. Obviously this would be the lid minus the Wild Wasabi card. I have directions for that box in last years post on November 23 2010. I Hope you enjoyed my case. Have a great day.
Brenda

Oct 31, 2011

Vintage Stocking Gift Card Holder

I love this stocking die cut and the vintage wallpaper embossing folder. I used Cherry Cobbler cardstock and Holly Berry designer paper to cut the stocking out. I accented with Wild Wasabi cardstock and button. The Cherry Cobbler Ribbon was stapled on and covered with the button using a glue dot. The Merry Christmas was stamped in Early Espresso from the Christmas Lodge set. I also used the scallop punch on the accent strip of Wild Wasabi. Natural twine was used on the button.Have a great day.
Brenda Anderson

Oct 26, 2011

Grandmas Trunk Cards week 3 in 12 weeks of Christmas

This card was inspired by Jan Rodrian. I did however change it a little. I used the stamp set Pines and Poinsettias (123762) Just let me say I am going to add another picture so you get the total feel of the card. It is very textured. I used 2 embossing folders
Framed Tulips (121809) and Vintage Wallpaper (120175)The base card is 8.5 x 5.5 The second layer is 4 x 5.25 and run it through using the Framed Tulips and the Big Shot. Then trim out the frame and use dimensionals to lift it up. The Third layer is 3 x 4.50 cut in Cherry Cobbler, tape that in the center of layer 2. The fourth layer is cut out of Very Vanilla it is 2 7/8 x 4.25. You stamp the swirl pattern in Crumb Cake (121030) and the Greeting (Hand Penned Holiday (124310) in Cherry Cobbler ink then run it through the big shot in the Vintage Wallpaper embossing folder. On a scrap piece of Very Vanilla color the pine cones in with a Chocolate Chip Marker (100071) huff onto it and stamp and move to another piece of scrap and using the markers Always Artichoke (105113) and Cherry Cobbler (119681) color in the leaves and berries huff on it and stamp it. Cut out the image of the leaves and berries. Then cut out the pine cones but using dimensionals POP them up. Using the Crumb Cake taffeta ribbon (122966) tie a bow using a glue dot place in the corner. Then add the pine cones and leaves. This is so elegant and rich even this second picture does not do it justice.
Thanks for stopping, and have a blessed day!
Brenda Anderson

Oct 24, 2011

12 Weeks of Christmas week 2

Hi everyone, time has gotten away again! So here is the week 2 of the 12 weeks of Christmas.
I love this paper in the Holly Berry Suite. The recipe is a sure hit at any workshop!
Base Card: 8,5 x 5.5 Very Vanilla (101650)
Layer 1 Wild Wasabi (108641) 4 x 5.25 round corners and using the Big shot and Petals-a-Plenty embossing folder (116824) .
Layer 2 Cherry Cobbler (119685) 3.25 x 4.25 rounded corners (119871)
Layer 3 Holly Berry Paper (124004) 3 x 4 rounded corners
Dotted Scallop Ribbon punch (119275) in Cherry Cobbler card stock.
Stocking builder punch (124095) Very Vanilla and Cherry Cobbler. using the Big Shot and Square Lattice Embossing folder (119976) run the vanilla stockings thru. Distress a bit with Soft Suede(115318), tape cherry cobbler pieces onto the stocking. Using a small 1/8 hole punch thru both stockings and tie together with the Cherry Cobbler bakers twine (123125). Using a glue dot add your button in Wild Wasabi. I used some old 1/8 ivory offray but I think bakers twine would look nice too. All supplies can be ordered through my suite: http://www.stampinup.net/esuite/home/brendasplace/

Oct 17, 2011

Gently Falling

Good Morning everyone,
Did I happen to mention how much I love fall. This morning the nutty earthy scent is in the air. I do miss all the beautiful leaves due to the strong winds pulling them off the trees. Well that is what has inspired this card. One of my good stamping friends Sue made a similar card and this was my take on it.
Supplies Used are the following:
Cardstock
Sahara Sand 8.5 x 4.25
Old Olive 4 x 5.25
Basic Black 3 x 4.25
Leaves: Poppy Parade, Old Olive, More Mustard, Cajun Craze
Ink: Soft Suede, More Mustard, Poppy Parade, Versa Mark
Stamp Sets Used: Gently Falling, Hand Penned Holidays
extras: 2 sided glue pen, fine gold glitter
Hope you enjoy this and have a great day
Brenda Anderson

Oct 13, 2011

Warmest Wishes

Hi everyone!
Oh I feel the warm of the fall setting in, I love the fall. I saw this card on line somewhere but when I went to make it it had vanished. So this is kinda what I remembered. I know it is different but hey I like different. I love how we can use punches to really create this card. I am demonstrating it tonight at our monthly meeting. I hope everyone likes it.
So here's the recipe:
Cardstock:
Pool Party 122924
Sahara Sand 121043
Early Espresso 119686
Soft Suede 115318
Pear Pizazz 119795
More Mustard 100946
Very Vanilla 101650
Stamp Set
Warmest of Wishes (Mini Holiday Hostess set) 122670
Designer Paper
Spice Cake 124003 (LOVE THIS PAPER)
Punches
1 inch circle 119868
3/4 inch circle 119873
Dotted Scallop Ribbon 119275
BIG SHOT 113439-Regularly 99.99 but FREE if you sign up under me as a demonstrator today! Go to:
http://www.stampinup.net/esuite/home/brendasplace/  JOIN THE FUN/JOIN NOW!
Die
Leaves #2 113459
Embossing Folders
Square Lattice 119976
Elegant Lines 119277
Glue dots/ Hemp Twine 100982
Thanks for stopping and have a great day!
Brenda Anderson

Oct 11, 2011

Vintage

I love cards that have lots of texture. This vintage card offers just that. With the Beveled Windowpane adding a "high end" feel to the whole lay out. So it is simple and very elegant.
Here's the recipe:
Cardstock: Soft Suede, Crumb Cake, Very Vanilla, Razzleberry.
Inks: Rich Razzleberry, Versa Mark
Punch: Large Designer Label
Embossing Powder: Clear
Ribbon: Crumb Cake taffeta (Seam binding fray's way to much)
Accessories: Large Beveled Windowpane, antique brass brads
Stamp Sets: Medallion, Bliss, En Francais
Embossing Folder: Lattice
Happy Stampin
Brenda

Oct 9, 2011

Week 1 (12 weeks of Christmas)

Leading up to Christmas should always start with the kick off of Thanksgiving, oh I can smell the turkey already! Yummy! So here is my kick off.
It must be said that Doris Denman is so creative and talented. She inspired me to make this easier more demonstrable card. Her original would be to hard to pack into a workshop. It is more of a technique class with all the embossing. I do love her work. So here's my recipe.
Cardstock: Soft Suede, More Mustard, Very Vanilla.
Designer Paper: Spice Cake
Inks: Soft Suede, More Mustard, Daffodil Delight
Stamp Set: Gently Falling and Four the Holidays
Punches: Mini Trio scallop circle, 1/16 Hand Held
Die Cut: Petal Cone (for the Banner)
Brads: Antique Brass
Linen Thread
Dimensionals, Glue Dots
Happy Stamping

Oct 3, 2011

Halloween Anti-bacterial gel


Here is a cutie Mini Hand sanitizer holder. I got the mini hand sanitizers from Bath and Body. Only 8 for $5.00.
Cardstock is Real Red
Cut two pieces of CS, one 3" X 10" and one 6" X 1 1/2".
Score the big piece at 1", 2", 5 1/2", and 6 1/2".
 Score the small piece along the long side at 1/2", 1 1/2", 4 1/2", and 5 1/2". Turn it and score along the short side at 1/4" and 1 1/4". Using a bone folder, fold over all the lines to make them nice and crisp.
Trim off the tabs of the second one leaving the section that is 3 inches whole so i.e. trim the 1/4 inch section off both sides leaving the 3 inch section whole. this allows you to use your red tacky tape for fold under to create the holder. You can decorate the front any way you want. I used some old designer paper and the
 Wicked Cool set totally inspired by Erica.  Thanks for stopping!

Sep 30, 2011

Sweet Treat

Stamp Set: Warmest of Wishes (In the new Holiday Mini)
Wicked Cool 118738
Owl Punch
Black Ink, Soft Suede Ink, Pumpkin Marker
Pumpkin Pie cardstock: 2 x 5.50 folded in half
Old Olive: 1 .75x 2.25
New cello treat bags filled with skittles
Stamp Owl in Soft Suede and color candy bag, mask and outline wings with Pumpkin Pie marker. Punch out owl using dimensionals put the owl onto the Old Olive . Stamp you spooky greeting in Black ink before you add the owl.

Sep 13, 2011

Vintage Halloween

I love the simplicity of this card, Black and Ivory with a splash of Pumpkin Pie, lol. Here's the recipe,
Cardstock:
Basic Black cut 5.5 x8.5 Fold and dry emboss with the Big shot and the Spider Web folder.
Punches: 2 3/8 Scallop in Basic Black
              Large Scallop Oval in Pumpkin Pie
              1 3/4 Circle in Very Vanilla
              Large Oval in Very Vanilla
Designer Paper: 1.5 x 4.25
Cardstock 1.75 x 4.25 Pumpkin Pie
Ribbon: 12 " Pumpkin Pie Grosgrain
Stamp Set: Greeting Card Kids
                  Wicked Halloween
Sizzlet Die: Little Leaves in Basic Black

Sep 12, 2011

Framed Art

Bought this great frame for 1.00 at Dollar Tree. Cut White glossy paper to fit. Embossed the Haunted Forest in Black. I used my Brayer first going over it in Daffodile Delight then again towards the bottom with Pumpkin Pie. I let that dry and took my Chocolate Chip marker to color in the tree. Remember to use your embossing buddy so your finger tips don't leave marks.  What a great home decor project for your next class!
Happy Staqmpin Brenda

Aug 27, 2011

Christmas Craft Buffet/ Milwaukee Area Crafters

This will be the kick off to my 12 weeks of Christmas! This will be a great start to all those holiday ideas your looking for! We will have door prizes, lunch, raffle tickets, free gifts, and Holiday specials that are truly once in a lifetime! Host a workshop prior to this event and recieve a 25.00 gift certificate! E-mail me at brenda44brenda@yahoo.com for details!
Thanks for stopping!

Aug 17, 2011

Circus Week #3 Winning Ribbon Prize

Base card Dafodil Yellow 8.5 x 5.5
Real Red 4 x 5.25
2 strips of DSP 1.50 x 12 score every 1/2 inch fold accordian style
tape both ends with red tacky tape. Cut 2 strips 1/2 x 2 in DSP.
1 Scallop Circle in Dafodill Yellow, 1 3/4 Whisper White, Black ink. Stamp Lion in Black, color in or leave plain.
Happy Stampin!
Brenda

Aug 16, 2011

Circus Week #2 In the spot light!

Under the Spotlight
Base card: Dafodill yellow 8.5 x 5.5
Black 4 x 5.25
Flags cut from small flags from the Big Top DSP
Red and White strip DSP .50 x 1.5
3 whisper white 1 .75 circles
Under the Big Top stamped in Black ink
Putting this together was super easy! Happy Stamping! Brenda

Aug 15, 2011

Welcome to circus week!


Day 1
Here is a cute children's Birthday card featuring Big Top DSP and Under the big top stamp set.
Here's the recipe:
Base Card 8.5 x 5.5
Real Red 5.25 x 4
Striped DSP 5 x 3.5
Star DSP 5 x 1.5
1/4 inch Red Grosgrain ribbon
Fold the base card and set aside. Build the layers and tie with the ribbon and then tape down to base card.
Real Red 2.75 x 2.25
Whisper White 2.5 x 2
Stamp Elephant in Basic Black and color in with Basic Grey ink and use a Blender pen to color.
Punch a ball out using the 1/2 inch punch use a dimensional to pop up.
Look forward to tomorrow for more Circus week!
Happy Stamping Brenda

Aug 10, 2011

It's been awhile........

Hi Everyone,
Well I have to say it has been a long year. My family has seen much better days. I know most of you have been wondering where I have been. It must seem like I just let my blog go. Nothing could be further from the truth. My BFF has battled cancer for the past year and that really consumed much of my brain. Various family members losing thier jobs, moving and needing help. Besides that we had a death of a infant, totally horrific if you can even imagine. Teen problems (Really??), nothing really new there if you have a few teens yourself. So with all that being said, I feel like the black cloud is moving away. I am so excited to get back to work. I really missed my business and my blog. I made half hearted attempts but I am sure you knew my heart wasn't in it. So I hope you look forward to daily cards and ideas since we are entering the most exciting 6 months of the year! Our new catalog looks great for ideas and fun projects! I will start my regular blog Monday August 15! Hope you stop by for the best of what I have to offer!
Happy Stampin!
Brenda Anderson

Aug 5, 2011

My Digital Studio

http://youtu.be/GiFODLCkvLk
Here is a link from my great friend Jean. It explains everything about My Digital studio, there is a link to see a quick tutorial about it all. If you have ever been interested in owning this software please watch. Contact me or order right from home. My store is at http://www.stampinup.net/esuite/home/brendasplace/
 Happy Stampin, Brenda

Jul 14, 2011

Circle Circus

Stamp Set: Circle Circus, You're a Gem, Four Frames
DSP: Regals Pattern Paper Pad, Love Letter
Cardstock: Black, Cherry Cobbler, Very Vanilla, Basic Grey
Ribbon: Cherry Cobbler Seam binding
Punches: 1/2 inch, 1 inch, Designer Label
Inks: Basic Black, Cherry Cobbler, Basic Grey
DSP Cherry cobbler cut 4.25 x 3.50
        Love Letter cut 4.25 x 2
Black cardstock cut 4 x 2.75, Very Vanilla 3.75 x 2.50

Jun 25, 2011

Zoo Train


Hi everyone,
Here is actually the second page to my 2 page layout. I am still working on the first page but hope to have them both up tomorrow. I was so excited I couldn't wait to share. I just started to dabble into scrapbooking. Now that I have the time it seems like so much fun. I would love for you to leave a comment.
Happy Scrappin!
Brenda

Jun 13, 2011

A GREAT CAKE

Hi everyone,
Just got back from a stamping retreat and made the best Cake, thank you Diane Trintz! I see this design being used in many different ways. How about a center piece for your next baby shower,wedding shower, co-worker birthday, or just a great way to say Thank You! How about for Fathers Day!
This takes 2 bags of Hershey candy nuggets, designer papers cut 1 x 3 assorted designer papers, 10 inch paper cake plate. 3 Styrofoam foam circles, 2 sheets of 12 x 12 designer papers to cover the Styrofoam cirlces, 5 yards of ribbons, any stamp set to your liking or die cut. Low temp hot glue gun to assemble.
I have a class this Friday night on how to make this sign up deadline is 3pm Wednesday June 15! Class Friday June 17 from 6-9.
Thanks for stopping
Brenda

May 13, 2011

Springtime in Paris

I had fun helping my best friends daughter figure out a springtime layout. This picture doesn't do it justice.
Supplies Used:
Stamp sets
Easter Blossoms
Notably Ornate
Artistic Etchings
Cardstock
12x12 Marina Mist
Very Vanilla
Baja Breeze
Regal Rose
Certain Celery
Pink Piroquette
Early Espresso
Designer Series Paper Stack Subtles
Punches and Diecuts
Little Leaves Sizzlits
Scallop Square Bigz clear DIES
Scallop Circle #2 Bigz DIES
Scallop Oval Nestabilities
Itty Bitty Shapes Trio punch flower
Scallop Square Punch
Extras
Ink:Chocolate Chip, linen thread, hand held punch, Cricut and 3/4 letters cut
Thanks for stopping by, have a great day!
Brenda Anderson

May 11, 2011

Schools Inn

My personal challenge has been to scrapbook for 30 days, well I failed! This was the 5th time I have done it this month! Well at least I'm getting better at trying.
Of course as the Stampin Up year is coming to an end and next month we release the retired list I fall in love with the Celebrations designer paper. What the heck, its only been at my disposal for 10 months and just now I am using it. grrrrr. Well anyways this page is for my grandson, Tyson.
Supplies are:
12 x 12 Pacific Point
Celebrations Designer paper
Pear Pizzazz Paper(1/2,3/4,1 inch punches for book worm.) Layers of eyes are using the owl punch. The books are using the window punch making them smaller to stack. The apples I took a short cut using the Cr---t. I used the corner punch to round of the edges of the chalk board. I plan to use a White gel pen to write his name and year. I hope you liked this and thanks as always for stopping by.
Brenda

Wish Big!

This was really fun and alot of cutting using the Big Shot!
Fun birthday card for any age. Supplies used were:
Base card Pacific Point 11 x 4.25
1st layer Celebrations Designer paper blue dot 3.75 x 3
number print 3.75 x 2.50. Over lap when taping down. Run Real Red 1/4 grosgrain ribbon across the overlapped paper and tape ribbon to back.
Items to BIGSHOT
Large Scallop Circle #2 die in Real Red
3 inch circle in Pear Pizzazz using circle cutter
Bold Cup Cake Die use designer paper for bottom, whisper white with dazzling diamonds, candles are pacific point, flames are daffodil. Red glitter paper and small star punch. Scallop Circle Punch and red glitter paper. 1 3/8 circle punch with whisper white and Wish Big in Real Red.
Whew! That was a mouth full. I hope you enjoyed today's post. Have a great day!
Brenda

May 10, 2011

Follow your dreams

This gift set can be used for a fathers day or a graduation gift. The reason the card is so SHINY is because I like to use the card as a center piece for the bag. I use the largest of the Cello Bags and trim it down to 5.25. I insert the card and using the red tacky tape I fold it over loosely, peel and stick. I also use 2 strips down each side in the back before centering it on the bag. I stamped the tissue and bag to match and made a quick tag to tie together.This was super easy. I hope you enjoy this one. Supplies used were:
Tissue and Bag from Michaels.
Stamp Set: Open Seas/Word Play
Ink: Basic Grey, Not quite Navy, Cherry cobbler
Cardstock: Base card 8.5 x 5.5 Not Quite Navy
Designer Paper 5.25 x 5.25 Nautical Expedition
Cherry Cobbler 2 x 4.25/DP 1.75 x 4.25 matching square 2 x 2 for top corner.
Basic Grey 3.25 x 2.75 Cherry Cobbler 3 x 2.50 Whisper White 2.75 x 2.25
Tag: Basic Grey 4.25 x 2.50 Cherry Cobbler 1x2.50 Designer Paper .75 x 2.50 Cherry cobbler round tab punch. Whisper White punched out of Designer label punch. Bakers twine, and Jumbo Eyelet.
Thanks for stopping Brenda

May 9, 2011

Get Well

I bought this tutorial from Kylie B. It was worth the work. Very Putsy but so fun, I had a great time doing this.
Base card: Tempting Turquoise
Layer 1 Real Red
Layer 2 Whisper White Clouds done in Tempting Turquoise.
Tree was out of Soft Suede with Espresso Ink wood grain stamp
Leaves are out of old olive using the leaf on the bird punch.
Flowers were real red with daffodil centers/ Mini trio punch. Nurses hat is the center of the owl turned upside down. Thanks for peeking.
Brenda

May 7, 2011

For Dad


I know this is Mothers Day weekend, but I stay ahead of myself, sometimes. This is one of those times! I love the new Open Seas stamp set we have in the new Summer Mini. Its been a long time since we've sailed the seas in a catalog. So I used the following:
Base Card Not Quite Navy
1st layer 4 x 5.25 Cherry Cobbler
2nd layer 3.75 x 5 Very Vanilla- torn down and sponged
Ink: Early Espresso, Not Quite Navy
Designer Paper:Nautical Expedition 1 x 3
Greeting Strip Very Vanilla 3/4 x 3
1 3/4, and 2 1/2 Circle Punch
Circle cutter 2" since we didn't have a 2" punch
I distressed everything in Early Espresso. Thanks for stopping
Brenda

Apr 28, 2011

Chains and Charms Class


Here is a preview to a Class I am holding in May. We will be making 12 inserts to change the style of your charm. The glare on the beveled glass is strong. Thanks for stopping I will post designs later. Brenda

Apr 26, 2011

Summer Mini 6x6 Sample Swap

Here is a 6x6 sample page of the Summer Mini Challenge. Using only stamp sets and NO Designer paper. This scrapbook sampler should get your customers in full swing for summer with just paper and stamps. Main focus this month is STAMPS, the foundation of our business. Sign up to join our swap today. E-mail me at brenda44brenda@yahoo.com if you are interested. The deadline is April 30th. All pages should be 6x6 . Using only 1 of 3 sets listed. Summer Splash-Sunny Fun-or Recess. Then mailed to me by May 16th and out for delivery by May 18th. They should be placed large ziplock bag with your mailing information included. Include the same postage plus one stamp. To be added to the list e-mail me as soon as possible there are 10 spots left. Mail to Brenda Anderson 8084 N. Grandview Drive, Brown Deer, WI 53223
Thanks for stopping, Brenda
May goal: To sell 30 stamp sets from the new summer mini.

Apr 25, 2011

Just a mini note


These cards were made into 3 x 3. I used the 4 frames stamp set and the new 12 x 12 paper that previewed for the coming 2011-2012 catalog. I used Pumpkin Pie and Old Olive with Very Vanilla for the Friend card. I used Regal Rose and Mambo ink and Very Vanilla for the Queen for a day with Vanilla seam binding and Victoria crochet lace. Key to my heart was Pacfic Point with Espresso and Whisper White. The bird and heart were out of Marina Mist. I used the red tacky tape to gather my ribbon onto. It goes faster than pulling threads. I love having these on hand for birthday gifts and such. I keep a couple in my purse for that "just in case I need it" situation. Hope you enjoy. These are great for make and takes. They have a beautiful punch for a small price of materials.
Thanks for stopping!
Brenda

Apr 24, 2011

Summer Accessories

Here is a project I taught using the Flourish stencil and stampin Brights Craft Spots. I did add some extras from some other stencils I had. I thought it turned out great! Bags were 3 for 9.99 at Michael's-used my 40 percent off so the bag were less than 2.00 each! Fun project for the summer.

Apr 23, 2011

Love Letter....

I started these pages and I love them! I started this for my husbands 50th birthday. Ahh young love.

Sew Suite

At our down line meeting the girls were challenged to create a "Sampler" from the Sew Suite line of products. Here are some of their work.


We have a very talented group, Great Job Girls!

Mar 30, 2011

New Camera

Finally got my new camera, will start posting again today! Thought I lost it at first, just couldn't find it. Found it in my dogs cage. Really puppy! Just glad I am back to work. Will post later this afternoon.
Happy to be back! Here is a quick pic of a card I made with Circle Circus!

Mar 13, 2011

The winners are

Congratulations! Yolanda, Cathy and Kendra are the only 3 girls to leave a comment. My computer caught my cold and just got back from the doctor, LOL. Malware is horrible to get ride of and I didn't want to send anything out that might spread to anyone else's computer. So girls since my computer is back and well you will be getting an e-mail later with a PDF attached. Thanks.
Brenda

Mar 6, 2011

Great Anniversary Gift

I just finished this gourgous double slider scrapbook. I plan to put black and white photos into it. I will be giving away 4 step by step directions just by leaving a comment. I will sending these out on Thursday March 10th to the lucky winners. Those interested in purchasing these great stamp camp directions will have a link on Friday March 11th. I will tease you this week by adding a few more photo's. Good Luck!
Thanks for stopping, Brenda

Mar 3, 2011

Coffee Anyone?

I just love this set. Morning cup is the nicest coffee set we've had in a while. I just love the Early Espresso with Cherry Cobbler. I know you can't see it in this picture but the Very Vanilla has dry embossed Lattice print.
Supplies Used:
Stamp Set: Morning Cup
Cardstock:
Early Espresso: 8.5 x 5.5
Cherry Cobbler 4 x 5.25 (Framed Tulips Folder)
VeryVanilla 3 1/8 x 4.50 (Lattice Folder)
3-1 1/4 Cherry Cobbler Circles
3-1 inch Very Vanilla Circles
15 inches of Striped Espresso 1 1/4 Ribbon needle and thread to gather ribbon.
Inks: Early Espersso, Cherry Cobbler
Blender Pen to color mugs. Thanks for stopping! Brenda

Mar 2, 2011

Very Vinty

Good Morning,
I made this vintage card during a demonstration on using our Decor Elements Stencils. I used the Kind Thoughts Brocade (small). Using the Craft ink I layed in the stencil design sprinkled embossing powder over the design, heat set it. Distress the edges of the Crumb Cake paper. Using the Flower Fold Die cut I cut out the flower and distressed the petals using Soft Suede. I then punch out a flower from the Boho punch out of Not Quite Navy and added a Vintage brad. I then attached to the base card made out of Not Quite Navy. Using the scallop oval I punched out of Baja Breeze stamping my Birthday greeting. It almost looks like I found it in my great grandmothers attic. It's also a great way to incorporate using our stencils to make cards. I also made a T-shirt design using white craft ink on a black t-shirt. I can post that tomorrow. Thanks for stopping and have a great day! Brenda

Mar 1, 2011

Double Slider Scrapbook (Botanicals)

 Hi everyone, I have been working on the coolest scrapbook with double sliders that hold pictures and journaling. You can also add pictures to the back of the book onto the photo mats just like the front.  I am showing it to you in the BARE BONES form before I add pictures and journaling. I had to use the K&Company Botanicals Paper, because my Stampin Up order has not yet made it's way here. I do plan on posting one made with the Designer Papers Love Letter and Celebrations by Friday. If this type of project interest you I will be giving away the full PDF file with all the pictures and supplies. All you have to do is leave a comment and on Friday I will be picking 4 lucky winners using random.org and you will receive the directions later that day. Have fun stamping!
Thanks for stopping,
Brenda Anderson